 Free |
|


Make delicious natural yogurt at home
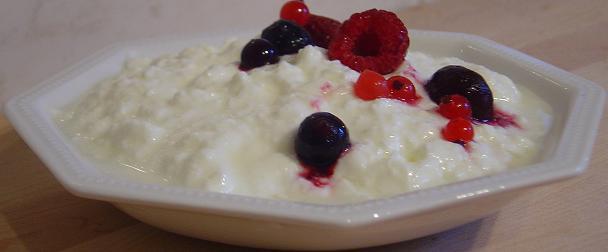
Natural yogurt ( Live )
Yogurt is so easy to make fresh and right every time. Fresh home made yogurt has levels of good bacteria that can exceed the mere live lable and earn it the coveted probiotic lable. Yogurt making usually utilizes two or more types of good bacteria. Milk is converted into yogurt by good bacteria in a process known as bacterial fermentation. This process is complicated but all we really need to know is that milk is turned into delicious yogurt which is more healthy than the original milk it was made from. The good bacteria increase the levels of vitamins B6 and B12 and riboflavin, folic acid, protein and they have increase the levels of digestible calcium.
The YoBrew method
I have studied both the industrial methods and home methods for producing yogurt and devised what I consider is the simplest method for the home yogurt maker without losing some of the control the professionals have. I set my self the goal of devising a method that is simple, inexpensive and easy to do at home and a process that is repeatable (no hit and miss, delicious yogurt every time). In my study it is clear the professional and amateur methods have a fair degree of similarity but there are a few very important differences. I have detailed these and their relevance in the table further down on this page. [Key factors & differences table]. In the "YoBrew's five steps" below I believe I have achieved the goal I set myself.
YoBrew's five simple steps to great yogurt
 Utensils
1 Litre Measuring Jug
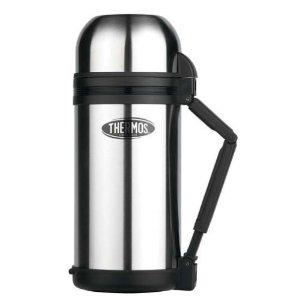
1.2 Litre Food Thermos
Food Thermometer
60ml measuring cup
Water bottle (This is not an
ingredient, none of the water is used up)
Tub for the final product
Ingredients
Yogurt base (60ml of Greek style
EasiYo yogurt base)
Milk 1 Litre (Whole, semi-skimmed
or even skimmed milk. I tried UHT milk expecting a fail but it worked well.)
The YoBrew five steps
1) Heat 1 Litre of milk to about 88C
2) Keep milk at about 88C for 30 minutes by sealing it in a pre-heated 1.2
Litre food thermos.
3) Cool milk to 42C (Using an upside down sealed water bottle will speed up
the process. See photo below)
4) Add 60ml of EasiYo, seal and shake well and leave for 7 hours. (Leave longer
for a sharper taste)
5) Transfer the yogurt from the thermos to a tub place the tub in the fridge.
(Leave to cool)
(This produces a mild yogurt. Adjust step 4 between 7 hours and nine hours depending on how much tang you like in your yogurt)
The five steps in more detail
| Steps | Time for this step Hours : Minutes |
Elapsed time | Activity | Temp | Photo |
|---|---|---|---|---|---|
| 0h : 0m | 12:00 | Make sure all utensils are all clean. Starter EasyYo Greek recommended but it can be live yogurt from a separate batch of from a live shop yogurt Measuring jug larger than 1 liter to measure 1 litre. 1.2 Litre food thermos Good thermometer 60ml or 1/4 cup measure Water bottle full of water (None of the water is used) Tub to put the final yogurt into |
Milk is in
fridge probably 5C |
|
|
| 1) Heat | 0h : 10m | 12:00 1210 |
Put 1 Litre of milk into a microwave safe jug. Microwave until 88C. This takes 10minutes in my microwave. Heating the milk between 85 and 90C not only pasteurizes the milk it also improves the final texture of the yogurt and prevents whey separation. While the milk is heating pour boiling water into the food thermos and seal to release pressure as required. This warms up the thermos and helps to keep it sterile. Pre heating the thermos is not essential but is recommended. | 5C - 88C |
 |
| 2)
Pasteurize
at 88C |
0h : 20m | 12:10 12:30 |
Pour the hot milk into the thermos flask and screw the cap on and leave for 20 minutes (Longer will be fine but shorter than 10 minutes is not recommended) The food thermos is a big advantage as it keep the temperature constant. If you leave it much longer that is no problem. 24 hours later will be fine. In fact it takes about 35hours in the sealed flask to get below the ideal yogurt making temperature. Since its all sealed and was all at about 88C in the container there is little room for contamination. | 88C |
 |
| 3) Cool | 2h : 0M | 12:30 14:30 |
Insert (upside
down) a clean, food safe, plastic water bottle sealed full of cool water. The
water bottle must have its cap screwed firmly on and should have a neck
that goes into the milk but its shoulders must not fit past the neck.
This cooler method reduces cooling time to about two hours. A sealed
thermos takes about 35 Hours to cool. Removing the thermos cups and
lid and replacing with a saucer reduces cooling time to about 10
hours. The quickest I have got this is just over 1 hour to cool the milk by using a cold water bottle. It was zero C. |
85C- 42C |
 |
| 4) Add starter, stir, shake, wait | 5h : 0m |
14:30 21:30 |
Add 60ml (1/4 cup) of EasiYo Greek yogurt base to the warm milk. Stir in well. Screw the thermos caps on securely and then shake the milk in the thermos well to mix it all up and re-homogenize the milk a bit. Then leave for 7 hours | 42C |
|
| 5) Fridge |
Over night | Over night | I transfer to a 1 litre tub and place in the fridge over night. The yogurt continues to mature as it cools. Live yogurt never really stops maturing but once its reached fridge temperature the fermentation rate is significantly slowed down. The rate of cooling affects the end results as it is still maturing. To keep things consistent always use the same tub(s). | 39C - 5C |
 |
Please note the above is the method I use and I personally get great results from but on the packet of EasiYo it clearly states Use contents of the pack immediately after opening. They do not specify why. I use mine 60ml at a time. Each time I carefully re-seal the foil pack. For me, my method works really well but it is up to you if you want to ignore storage the instructions on the EasiYo pack. I can only assume that in the sealed foil pack under cool dry condition the dry culture can stay viable for a long period and as soon as the pack is opened the ageing process speeds up. This is true of most cultures including yeast packs used for brewing but we do not often see instructions insisting on using the full contents all at once.
Key factors in yoghurt making and differences in approaches
| Factor | Effect | Professional approach | Armature approach | Our approach |
|---|---|---|---|---|
| Starter culture | Speed of the initial process, quality of the process, flovour of end product | Use clinically produced starter cultures | often propose carrying over some of the last batch of yogurt | 60ml of EasiYo per Litre of milk. This give the benefits of a quality culture containing three type of good bacteria. In my opinion making pure EsiYo as they instruct is a bit pricy but using 60ml per litre of milk produces quality, low cost yogurt. |
| Temperature control | Exact times and temperature control are key to produce a repeatable process and avoids the hit and miss yogurt making . This is especially true for home yogurt making as they are not likely to measure acidity levels. Temperature affects the rate of the process and has an effect on the flavour. | Professional are precise in temperature control but can have problems due to volume. It may take an hour to drain, cool and package a vat this means there is a difference in maturity between the first and last. | Often lack temperature control. Often have procedures such as wrap the container in a towel and put near a radiator. As this is done like this a lot it is reasonable to assume that yogurt making has a good degree of tolerance to these variances or that the consumers do not mind not controlling exactly how sharp or mild the end product is. | Use a good thermometer. Pasteurize at 88C. This is a good temperature to kill microbes and it improves the body of the final yogurt as well as reduces the risk of whey separation later on. Cool to 42C. Adding the starter culture at 42C and sealing the thermos the contents will drop from 42C to 39C over 7 hours keeping it in the ideal yogurt making temperature range. This is exactly what the 1.2 Litre food thermos does without any special effort. |
| Acidity measure | Acidity indicates when the yogurt is done for your style of yogurt. More acidic more sharp, less acidity to become a more mild. | Professionals measure the acidity regularly to tell them exactly when the yogurt is ready. | No acidity measure but may taste from time to time or look at the yogurt during the process to see when solids are formed. Solids form at PH4.6 | Because our process uses exact temperatures, timings and the same starter, the acidity per time is always the same so we do not need to measure acidity. |
| Milk | The texture and taste of yogurt has much to do with the main ingredient Milk. Milk is very complicated with over 100,000 different molecules. Some elements in milk are essential to yogurt making bacteria but are not available in all milk. | Have a specially formulated milk to provide the qualities that they specifically need for their product. Particular attention is paid to providing a thick yogurt that is lower in fat. Milk is usually fresh straight from the dairy and then thickened using condensed skimmed milk or adding powder milk. In addition they add thickeners and emulsifiers to improve the creamy nature of the end product. | Shop milk, Organic milk, milk plus cream, milk plus half and half, milk plus powder milk, milk plus condensed milk. Generally the say to avoid UHT milk. | We add 60ml of EasiYo to shop milk. In addition to the essential yogurt making bacteria, EasiYo contains milk powder and natural emulsifier (lecithin), these ingredients make the milk thicker and improve the texture of the end product. I suggest trying standard shop whole milk plus 60ml of EasiYo and then experiment with different types of milk. If you make small changes to the five steps above then its good to record conditions and results such that you can repeat the really good ones. I tried UHT milk with this method expecting a fail but was presently surprised. The wife and kids prefer the UHT version. |
| Homogenization | Homogenization results in a smooth even creamy yogurt | Use homogenized milk and re-homogenize it at a key point in the process | No particular attention is paid to homogenization. But they often stir the end product | Use homogenized milk if possible. Re-homogenize a bit, by shaking the thermos well at the start of fermentation and again after 5 hours of fermentation. |
The sheer number of people on the net sharing their yogurt instructions shows just how easy it actually is to produce a really good end product at home using very basic utensils. I have devised a simple method to follow for yogurt making that also gives you better control of the process and repeatable results, however yogurt making is very tolerant to variation and even though some sites on yogurt making, I would say, are not right I am sure it works for them. Some people have very flexible tastes in yogurt and if its mild or sharp its all fine to them. For these people exact control is not very key. I have paid particular attention to hygiene and do not propose using a dollop of your last yogurt as a starter for your next yogurt but that is a very popular method for amateurs. Whilst I do not choose to do this I do not have an issue with those that do. It clearly works for a lot of people.
Lactic acid fermentation by lactic bacteria

1 mole C12H22O11 ==> 4 moles CH3CHOHCOOH
Lactose (glucose + glucose) Lactic Acid
(Note to self: Need to study / explain oxygen balance for the above)
The constituents of milk are very complex containing over 100,000 different molecules. Lactic bacteria such as l.bulgaricus and s.thermophilus thrive in warm milk. The gain their energy by using up the lactose sugar in the milk. This is why yogurt is more acceptable to lactose intolerant people than milk. The bacteria use up the lactose sugar and convert it into lactic acid. This increases the acidity of the milk. As the acidity increases the PH drops. Once the PH drops below PH4.6 the casein protein coagulates / precipitates making the mixture thicker. If the milk is not homogenized then the milk will separate into solids (curds) and liquid (whey). If the milk is homogenized just prior to reaching PH4.6 then when it goes past PH4.6 then separation occurs but it happens and a much finer level resulting in an even thick and creamy yogurt. For a creamy overall yogurt homogenization is important however some yogurt making focuses on straining off the curds from the whey to produce a much thicker yogurt. For this type of yogurt lack of homogenization is key. The way that casein forms solids is down to the structures it forms as different acid conditions. UHT milk heats the milk for a short period to about 135C which changes the behavior of caseing and reduces the ability to form curds and whey which is why UHT milk is normally not suitable for yogurt making. I tried UHT with the method above and it worked fine. In fact the wife and kids prefer it. I suspect that the addition of the EasyYo helps the overall process.
As we can see the overall function of the lactic bacteria in yogurt making is to convert lactose sugar into lactic acid which increases the acidity and this acidity causes the milk to thicken up as curs and whey are formed. Actually this is a very high level view of what is going on. The bacteria are busy synthesizing vitamins, folic acid and other nutrients that are very beneficial to people. The yogurt making bacteria create an environment that is less suited to other bacteria and is a way that they fight off other bacteria. This action is what helped people thousands of years ago keep perishable milk for longer. It is thought but not yet proven that they people thousands of years ago used some of their last batch of good tasting yogurt to turn their next batch of milk into yogurt. Many times I read how the good bacteria fight off all other bad bacteria but this is not a safe assumption. It is true that the lactic bacteria are good and very beneficial to people but good hygiene is essential in yogurt production.
FREE home brewing magazines
CONTACT: Email: Do drop us a line.
 All text on this site is purely the various contributing author's personal views and
should not be taken as fact.
All text on this site is purely the various contributing author's personal views and
should not be taken as fact.